Saturday, January 22, 2011

ASP.NET MVC 3 Project with NUnit as Testing framework

[UPDATE] Marcus has been able to make a new Visual Studio Extension that add NUnit as an option when selecting test framework for ASP.NET MVC 3. You can get that from Visual Studio gallery for free.

Don’t you sometimes have this feeling when you need something that Microsoft could make out of the box?

I got the same kind of idea today when I was trying to create a new ASP.NET MVC 3 website with NUnit as test framework. And I could find this page How to: Add a Custom ASP.NET MVC Test Framework in Visual Studio but the whole thing wasn’t very easy and it was indicated that you should insert some keys and values into registry.

“Man, I don’t like that”, I thought, “Isn’t there an easier solution which could make it all work ?”.

I googled a little bit, and I found this blog post: ASP.NET MVC 3 with NUnit Testproject written by Marcus Kimpenhaus. In the bottom of this blog post there is a link via which you can download and install the NUnit template for ASP.NET MVC 3, this template worked for x64 bit machines, but I left a comment and he was nice to update it for x86 machines too. Thanks very much Marcus this project template is invaluable when need it. I also suggested to publish this template to NuGet feed, and if this will work it would be great and you could install it directly from your NuGet console.

So let’s resume what do you need to do in order to have a NUnit Test project template for your ASP.NET MVC 3 project:

  1. At the bottom of the blog post click the download link for the project template
  2. Run install.bat as administrator, now this bat will check the type of your machine : x64 or x86 and will edit registry accordingly to that, it will also update your Visual Studio 2010 cache so please wait a little bit there
  3. Go and thank Marcus for his work, and send a mail to ASP.NET team to include this project template in the Visual Studio SP1. After all the SP1 is coming in spring so they still have lots of time to include it.

Hope this will help someone.

Tuesday, January 18, 2011

Get used to Mercurial using TortoiseHg and VisualHg

Hi, guys today I’m gonna link a little video about another Distributed Versionning Control System (DVCS), Mercurial. If you don’t know that’s what I decided to use as a source control system for Pet Shelter – my learning experiment with ASP.NET MVC 3. Read more at http://lnkd.in/v5uARq.

Anyway today we’ll talk about Mercurial and TortoiseHg and a little bit about VisualHg which kinda integrates Mercurial into your usual IDE environment.

So first video is from vimeo:

Mercurial with TortoiseHG: The Basics from ragingmon on Vimeo.

Another excellent video is at Rob Conery Tekpub website. Here is the link

http://tekpub.com/view/dotnet-oss/7

Only a little problem to view it you need to be registered. And by the way registration literally takes 20 seconds. Please take a look at that wonderful video with the length of 34 minutes.

Hope you got it. No matter how far you go, you just need to know Git or Mercurial, and may be in your next project when you’ll be using these tools you could make another video and send to me it’s link and I will share it with the people who read my blog.

Take care.

Monday, January 10, 2011

Create a sample Rails 3 application running with JQuery

Hi guys,

Today I’m going to show you how to combine the power of Rails 3 with JQuery.

By default Rails 3 comes with Prototype, but let’s say I don’t know Prototype (I really don’t … a good topic for homework), but I still need to use Javascript in my brand new application and I know JQuery, or may be I need JQuery UI components, for example a DateTime picker,  than all I need to do is combine JQuery and Rails 3 right ? Yeah so let’s try it manually.

1.   First of al we need to create a brand new Rails 3 app :

$ rails new jquery_demo_app -J
      create
      create  README
      create  Rakefile
      create  config.ru
      create  .gitignore
      create  Gemfile
      create  app
      create  app/controllers/application_controller.rb
      create  app/helpers/application_helper.rb
      create  app/mailers
      create  app/models
      create  app/views/layouts/application.html.erb
      create  config
      create  config/routes.rb
      create  config/application.rb
      create  config/environment.rb
      create  config/environments
      create  config/environments/development.rb
      create  config/environments/production.rb
      create  config/environments/test.rb
      create  config/initializers
      create  config/initializers/backtrace_silencers.rb
      create  config/initializers/inflections.rb
      create  config/initializers/mime_types.rb
      create  config/initializers/secret_token.rb
      create  config/initializers/session_store.rb
      create  config/locales
      create  config/locales/en.yml
      create  config/boot.rb
      create  config/database.yml
      create  db
      create  db/seeds.rb
      create  doc
      create  doc/README_FOR_APP
      create  lib
      create  lib/tasks
      create  lib/tasks/.gitkeep
      create  log
      create  log/server.log
      create  log/production.log
      create  log/development.log
      create  log/test.log
      create  public
      create  public/404.html
      create  public/422.html
      create  public/500.html
      create  public/favicon.ico
      create  public/index.html
      create  public/robots.txt
      create  public/images
      create  public/images/rails.png
      create  public/stylesheets
      create  public/stylesheets/.gitkeep
      create  public/javascripts
      create  public/javascripts/.gitkeep
      create  public/javascripts/application.js
      create  script
      create  script/rails
      create  test
      create  test/fixtures
      create  test/functional
      create  test/integration
      create  test/performance/browsing_test.rb
      create  test/test_helper.rb
      create  test/unit
      create  tmp
      create  tmp/sessions
      create  tmp/sockets
      create  tmp/cache
      create  tmp/pids
      create  vendor/plugins
      create  vendor/plugins/.gitkeep

That “-J” option tells Rails that we don’t need Javascript stuff generated.
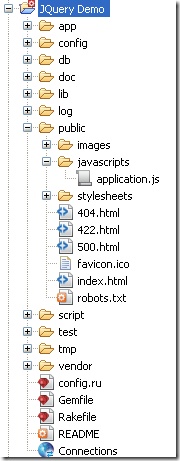
Application before adding jquery

2.   Next we need to download the latest Jquery version minified and put it under the public/javascripts folder.

      So all we need is to copy and paste the text from http://code.jquery.com/jquery-latest.min.js to jquery.js file.

3.   Next we need to copy latest Rails Jquery drivers and put it under public/javascripts too.

     So we go to https://github.com/rails/jquery-ujs/blob/master/src/rails.js click on raw link and copy it to rails.js file.

JQuery UJS driver

These 2 steps can be done in one shot using curl tool.

$ cd jquery_demo_app/
$ cd public/javascripts/
$ curl http://code.jquery.com/jquery-latest.min.js > jquery.js
  % Total    % Received % Xferd  Average Speed   Time    Time     Time  Current
                                 Dload  Upload   Total   Spent    Left  Speed
100 78601  100 78601    0     0   181k      0 --:--:-- --:--:-- --:--:--  213k

$ curl https://github.com/rails/jquery-ujs/raw/master/src/rails.js > rails.js
  % Total    % Received % Xferd  Average Speed   Time    Time     Time  Current
                                 Dload  Upload   Total   Spent    Left  Speed
100  4150  100  4150    0     0   4429      0 --:--:-- --:--:-- --:--:--  5313

$ ls    
application.js  jquery.js  rails.js 

4.   And the last thing is to edit in config/application.rb file these lines

# JavaScript files you want as :defaults (application.js is always included).
config.action_view.javascript_expansions[:defaults] = %w()

We need to include jquery.js and rails.js into defaults. And optionally you could specify CDN network but this isn’t always required.

config.action_view.javascript_expansions[:defaults] = %w(jquery rails)
config.action_view.javascript_expansions[:cdn] = %w(https://ajax.googleapis.com/ajax/libs/jquery/1/jquery.min.js rails)

As you can see there are a lot of steps which should be repeated for each application where we want to use JQuery.

Fortunately enough we have another solution.

Gem “jquery-rails”

jquery-rails

There is a gem created https://github.com/indirect/jquery-rails which will help us to avoid repeating these steps over and over again.

Let’s experiment with another new application.

Add jquery-rails into our Gemfile.

And run bundle install command. And you could also commit it to a git repo, so if something goes wrong you could revert to initial version.

$ rails new another_jquery_app

# In Gemfile add this line
gem 'jquery-rails'

$ bundle install
Fetching source index for http://rubygems.org/
.
.
.
Using jquery-rails (0.2.6)
.
.
.
Your bundle is complete! Use `bundle show [gemname]` to see where a bundled gem is installed.

$ git init
$ git add .
$ git commit -am "Initial commit"

Now let’s install jquery

$ rails generate jquery:install
      remove  public/javascripts/controls.js
      remove  public/javascripts/dragdrop.js
      remove  public/javascripts/effects.js
      remove  public/javascripts/prototype.js
    fetching  jQuery (1.4.4)
      create  public/javascripts/jquery.js
      create  public/javascripts/jquery.min.js
    fetching  jQuery UJS adapter (github HEAD)
c:/Ruby192/lib/ruby/1.9.1/net/http.rb:677:in `connect': SSL_connect returned=1 errno=0 state=SSLv3 read server certificate B: certificate
ed (OpenSSL::SSL::SSLError)
        from c:/Ruby192/lib/ruby/1.9.1/net/http.rb:677:in `connect'
        from c:/Ruby192/lib/ruby/1.9.1/net/http.rb:637:in `do_start'
        from c:/Ruby192/lib/ruby/1.9.1/net/http.rb:626:in `start'
        from c:/Ruby192/lib/ruby/1.9.1/open-uri.rb:306:in `open_http'
        from c:/Ruby192/lib/ruby/1.9.1/open-uri.rb:769:in `buffer_open'
        from c:/Ruby192/lib/ruby/1.9.1/open-uri.rb:203:in `block in open_loop'
        from c:/Ruby192/lib/ruby/1.9.1/open-uri.rb:201:in `catch'
        from c:/Ruby192/lib/ruby/1.9.1/open-uri.rb:201:in `open_loop'
        from c:/Ruby192/lib/ruby/1.9.1/open-uri.rb:146:in `open_uri'
        from c:/Ruby192/lib/ruby/1.9.1/open-uri.rb:671:in `open'
        from c:/Ruby192/lib/ruby/1.9.1/open-uri.rb:33:in `open'
        from c:/Ruby192/lib/ruby/gems/1.9.1/gems/thor-0.14.6/lib/thor/actions/file_manipulation.rb:77:in `get'
        from c:/Ruby192/lib/ruby/gems/1.9.1/gems/jquery-rails-0.2.6/lib/generators/jquery/install/install_generator.rb:34:in `download_ujs
        from c:/Ruby192/lib/ruby/gems/1.9.1/gems/thor-0.14.6/lib/thor/task.rb:22:in `run'
        from c:/Ruby192/lib/ruby/gems/1.9.1/gems/thor-0.14.6/lib/thor/invocation.rb:118:in `invoke_task'
        from c:/Ruby192/lib/ruby/gems/1.9.1/gems/thor-0.14.6/lib/thor/invocation.rb:124:in `block in invoke_all'
        from c:/Ruby192/lib/ruby/gems/1.9.1/gems/thor-0.14.6/lib/thor/invocation.rb:124:in `each'
        from c:/Ruby192/lib/ruby/gems/1.9.1/gems/thor-0.14.6/lib/thor/invocation.rb:124:in `map'
        from c:/Ruby192/lib/ruby/gems/1.9.1/gems/thor-0.14.6/lib/thor/invocation.rb:124:in `invoke_all'
        from c:/Ruby192/lib/ruby/gems/1.9.1/gems/thor-0.14.6/lib/thor/group.rb:226:in `dispatch'
        from c:/Ruby192/lib/ruby/gems/1.9.1/gems/thor-0.14.6/lib/thor/base.rb:389:in `start'
        from c:/Ruby192/lib/ruby/gems/1.9.1/gems/railties-3.0.3/lib/rails/generators.rb:163:in `invoke'
        from c:/Ruby192/lib/ruby/gems/1.9.1/gems/railties-3.0.3/lib/rails/commands/generate.rb:10:in `<top (required)>'
        from c:/Ruby192/lib/ruby/gems/1.9.1/gems/activesupport-3.0.3/lib/active_support/dependencies.rb:239:in `require'
        from c:/Ruby192/lib/ruby/gems/1.9.1/gems/activesupport-3.0.3/lib/active_support/dependencies.rb:239:in `block in require'
        from c:/Ruby192/lib/ruby/gems/1.9.1/gems/activesupport-3.0.3/lib/active_support/dependencies.rb:225:in `block in load_dependency'
        from c:/Ruby192/lib/ruby/gems/1.9.1/gems/activesupport-3.0.3/lib/active_support/dependencies.rb:596:in `new_constants_in'
        from c:/Ruby192/lib/ruby/gems/1.9.1/gems/activesupport-3.0.3/lib/active_support/dependencies.rb:225:in `load_dependency'
        from c:/Ruby192/lib/ruby/gems/1.9.1/gems/activesupport-3.0.3/lib/active_support/dependencies.rb:239:in `require'
        from c:/Ruby192/lib/ruby/gems/1.9.1/gems/railties-3.0.3/lib/rails/commands.rb:17:in `<top (required)>'
        from script/rails:6:in `require'
        from script/rails:6:in `<main>'


Because I use Windows I got this “certificate verify failed (OpenSSL::SSL::SSLError)”. If you don’t have this error skipped to  I made a little research and found out that I need to point Rails to a certificate to use when dealing with HTTPS. To see more about this issue follow this link:  jQuery, GitHub, SSL. Thanks to 19th comment author. He indicated a solution.

So all we need to do is copy file from https://github.com/Shopify/active_merchant/blob/master/lib/certs/cacert.pem somewhere locally and than indicate this URI in C:\Ruby\Ruby192\lib\ruby\1.9.1\open_uri.rb around line 289

http.use_ssl = true
http.verify_mode = options[:ssl_verify_mode] || OpenSSL::SSL::VERIFY_PEER
http.ca_file = 'C:\Ruby\certs\cacert.pem' # you should indicate where you’ve set your file locally
store = OpenSSL::X509::Store.new

Now let’s try again. Before we try again we’ll need to checkout the version before error occurred.

$ git checkout -f

$ rails generate jquery:install
      remove  public/javascripts/controls.js
      remove  public/javascripts/dragdrop.js
      remove  public/javascripts/effects.js
      remove  public/javascripts/prototype.js
    fetching  jQuery (1.4.4)
   identical  public/javascripts/jquery.js
   identical  public/javascripts/jquery.min.js
    fetching  jQuery UJS adapter (github HEAD)
    conflict  public/javascripts/rails.js
Overwrite d:/rails_tutorial_projects/another_jquery_app/public/javascripts/rails
.js? (enter "h" for help) [Ynaqdh] Y
       force  public/javascripts/rails.js

Now your application is using JQuery instead of Prototype and all we needed to do is use this little useful gem and I encourage you to use it also.

By the way if you need JQuery ui installed just use

$ rails generate jquery:install --ui

So that is how you can use Rails 3 with JQuery instead of Prototype. Take care.

Thursday, January 6, 2011

Git in Action

Hi, guys found this amazing and quite simple video about using Git. Take a look.

Git Screencast: Git in Action from Ralf Ebert on Vimeo.

Give thumbs up to this post if you liked it and please comment about what do you also want to see in my blog.

Saturday, December 11, 2010

Ruby Challenge 2010: Creating first application and working with Git

Hi all one more time,

Last time we stopped by installing Rails. Let’s check one more time it’s current version

C:\Users\Monomachus>rails --version
Rails 3.0.3

You can notice that from the last time we talked about it Rails version changed from 3.0.1 to 3.0.3. That’s because I’ve updated my system.

Now lets create a new application with Rails. We can do it by using “rails new name_of_the_application” command

D:\rails_tutorial_project>rails new first_application
      create
      create  README
      create  Rakefile
      create  config.ru
      create  .gitignore
      create  Gemfile
      create  app
      create  app/controllers/application_controller.rb
      create  app/helpers/application_helper.rb
      create  app/mailers
      create  app/models
      create  app/views/layouts/application.html.erb
      create  config
      create  config/routes.rb
      create  config/application.rb
      create  config/environment.rb
      create  config/environments
      create  config/environments/development.rb
      create  config/environments/production.rb
      create  config/environments/test.rb
      create  config/initializers
      create  config/initializers/backtrace_silencers.rb
      create  config/initializers/inflections.rb
      create  config/initializers/mime_types.rb
      create  config/initializers/secret_token.rb
      create  config/initializers/session_store.rb
      create  config/locales
      create  config/locales/en.yml
      create  config/boot.rb
      create  config/database.yml
      create  db
      create  db/seeds.rb
      create  doc
      create  doc/README_FOR_APP
      create  lib
      create  lib/tasks
      create  lib/tasks/.gitkeep
      create  log
      create  log/server.log
      create  log/production.log
      create  log/development.log
      create  log/test.log
      create  public
      create  public/404.html
      create  public/422.html
      create  public/500.html
      create  public/favicon.ico
      create  public/index.html
      create  public/robots.txt
      create  public/images
      create  public/images/rails.png
      create  public/stylesheets
      create  public/stylesheets/.gitkeep
      create  public/javascripts
      create  public/javascripts/application.js
      create  public/javascripts/controls.js
      create  public/javascripts/dragdrop.js
      create  public/javascripts/effects.js
      create  public/javascripts/prototype.js
      create  public/javascripts/rails.js
      create  script
      create  script/rails
      create  test
      create  test/fixtures
      create  test/functional
      create  test/integration
      create  test/performance/browsing_test.rb
      create  test/test_helper.rb
      create  test/unit
      create  tmp
      create  tmp/sessions
      create  tmp/sockets
      create  tmp/cache
      create  tmp/pids
      create  vendor/plugins
      create  vendor/plugins/.gitkeep

Will get to each of those files in this series posts, this is what I hope at least to achieve.

Tip of the day: .gitignore file is used to let git know what kind of files we don’t want to add/commit to repository 

Ok, so we got everything created now and rails made for us a brand new application which should already work so let’s try it with “rails server” command. First we need to cd into the new created directory.

And I got error at first

railsStartError

And these errors in command line

D:\rails_tutorial_project\first_application>rails server
C:/rubies/Ruby192/lib/ruby/gems/1.9.1/gems/sqlite3-ruby-1.3.2-x86-mingw32/lib/sq
lite3.rb:6:in `require': no such file to load -- sqlite3/sqlite3_native (LoadErr
or)
        from C:/rubies/Ruby192/lib/ruby/gems/1.9.1/gems/sqlite3-ruby-1.3.2-x86-m
ingw32/lib/sqlite3.rb:6:in `rescue in <top (required)>'
        from C:/rubies/Ruby192/lib/ruby/gems/1.9.1/gems/sqlite3-ruby-1.3.2-x86-m
ingw32/lib/sqlite3.rb:2:in `<top (required)>'
        from C:/rubies/Ruby192/lib/ruby/gems/1.9.1/gems/bundler-1.0.7/lib/bundle
r/runtime.rb:64:in `require'
        from C:/rubies/Ruby192/lib/ruby/gems/1.9.1/gems/bundler-1.0.7/lib/bundle
r/runtime.rb:64:in `block (2 levels) in require'
        from C:/rubies/Ruby192/lib/ruby/gems/1.9.1/gems/bundler-1.0.7/lib/bundle
r/runtime.rb:62:in `each'
        from C:/rubies/Ruby192/lib/ruby/gems/1.9.1/gems/bundler-1.0.7/lib/bundle
r/runtime.rb:62:in `block in require'
        from C:/rubies/Ruby192/lib/ruby/gems/1.9.1/gems/bundler-1.0.7/lib/bundle
r/runtime.rb:51:in `each'
        from C:/rubies/Ruby192/lib/ruby/gems/1.9.1/gems/bundler-1.0.7/lib/bundle
r/runtime.rb:51:in `require'
        from C:/rubies/Ruby192/lib/ruby/gems/1.9.1/gems/bundler-1.0.7/lib/bundle
r.rb:112:in `require'
        from D:/rails_tutorial_project/first_application/config/application.rb:7
:in `<top (required)>'
        from C:/rubies/Ruby192/lib/ruby/gems/1.9.1/gems/railties-3.0.3/lib/rails
/commands.rb:28:in `require'
        from C:/rubies/Ruby192/lib/ruby/gems/1.9.1/gems/railties-3.0.3/lib/rails
/commands.rb:28:in `block in <top (required)>'
        from C:/rubies/Ruby192/lib/ruby/gems/1.9.1/gems/railties-3.0.3/lib/rails
/commands.rb:27:in `tap'
        from C:/rubies/Ruby192/lib/ruby/gems/1.9.1/gems/railties-3.0.3/lib/rails
/commands.rb:27:in `<top (required)>'
        from script/rails:6:in `require'
        from script/rails:6:in `<main>'

After poking a little bit on forums I saw that I need to download the latest version of Sqlite dll’s and put them into my “ruby\bin” folder. Ok no problems, let’s do it. So you can download it here.

sqliteDownloads

Downloaded, unziped, xcopied into ruby\bin folder. Let’s try again.

D:\rails_tutorial_project\first_application>rails server
=> Booting WEBrick
=> Rails 3.0.3 application starting in development on http://0.0.0.0:3000
=> Call with -d to detach
=> Ctrl-C to shutdown server
[2010-12-11 10:00:40] INFO  WEBrick 1.3.1
[2010-12-11 10:00:40] INFO  ruby 1.9.2 (2010-08-18) [i386-mingw32]
[2010-12-11 10:00:44] INFO  WEBrick::HTTPServer#start: pid=3560 port=3000

Ok so now that works fine.

runningServer

P.S. Anyone knows how to run the server and then to detach in windows it also gives me an error in Windows when I try to use “rails server –d”

D:\rails_tutorial_project\first_application>rails server -d
=> Booting WEBrick
=> Rails 3.0.3 application starting in development on http://0.0.0.0:3000
C:/rubies/Ruby192/lib/ruby/gems/1.9.1/gems/activesupport-3.0.3/lib/active_suppor
t/core_ext/process/daemon.rb:3:in `fork': fork() function is unimplemented on th
is machine (NotImplementedError)
        from C:/rubies/Ruby192/lib/ruby/gems/1.9.1/gems/activesupport-3.0.3/lib/
active_support/core_ext/process/daemon.rb:3:in `daemon'
        from C:/rubies/Ruby192/lib/ruby/gems/1.9.1/gems/rack-1.2.1/lib/rack/serv
er.rb:262:in `daemonize_app'
        from C:/rubies/Ruby192/lib/ruby/gems/1.9.1/gems/rack-1.2.1/lib/rack/serv
er.rb:202:in `start'
        from C:/rubies/Ruby192/lib/ruby/gems/1.9.1/gems/railties-3.0.3/lib/rails
/commands/server.rb:65:in `start'
        from C:/rubies/Ruby192/lib/ruby/gems/1.9.1/gems/railties-3.0.3/lib/rails
/commands.rb:30:in `block in <top (required)>'
        from C:/rubies/Ruby192/lib/ruby/gems/1.9.1/gems/railties-3.0.3/lib/rails
/commands.rb:27:in `tap'
        from C:/rubies/Ruby192/lib/ruby/gems/1.9.1/gems/railties-3.0.3/lib/rails
/commands.rb:27:in `<top (required)>'
        from script/rails:6:in `require'
        from script/rails:6:in `<main>'
WORKING WITH GIT

Ok now let’s try to work a little bit with git. I’ll be using now the “Git Bash” command line.

$ git init                // initilize the repository
$ git add .               // adds everything to repository
$ git commit -m "First commit" // make initial commit

So here everything should be clear. In git commit command –m means specifying message.

Now we can check the logs

Monomachus@MONOMACHUS-PC /d/rails_tutorial_project/first_application (master)
$ git log
commit 24d181eef79f1c6bd28898bcb0a587ff04a73dca
Author: unknown <Monomachus@.(none)>
Date:   Sat Dec 11 10:12:55 2010 +0200

    First commit

Now let’s see how can we checkout but first let’s delete some important file (Gemfile for example) and verify the status of git.
Monomachus@MONOMACHUS-PC /d/rails_tutorial_project/first_application (master)
$ rm Gemfile*

Monomachus@MONOMACHUS-PC /d/rails_tutorial_project/first_application (master)
$ ls
README    app     config.ru  doc  log     script  tmp
Rakefile  config  db         lib  public  test    vendor

Monomachus@MONOMACHUS-PC /d/rails_tutorial_project/first_application (master)
$ git status
# On branch master
# Changed but not updated:
#   (use "git add/rm <file>..." to update what will be committed)
#   (use "git checkout -- <file>..." to discard changes in working directory)
#
#       deleted:    Gemfile
#       deleted:    Gemfile.lock
#
no changes added to commit (use "git add" and/or "git commit -a")

Monomachus@MONOMACHUS-PC /d/rails_tutorial_project/first_application (master)
$ git checkout -f

Monomachus@MONOMACHUS-PC /d/rails_tutorial_project/first_application (master)
$ ls
Gemfile       README    app     config.ru  doc  log     script  tmp
Gemfile.lock  Rakefile  config  db         lib  public  test    vendor


So you can see here that using “git status” command we checked out the status of repository and with “git checkout –f” command we made a forced checkout and restored everything as it was before.

It’s all for today. Next time we’ll play a little with Github and Heroku. I hope you liked it.